

My Sourdough Recipe and Process
The Sourdough I Didn’t Know I Needed
Some recipes sneak up on you. You try them out of curiosity… and suddenly they become the loaf you can’t stop thinking about. This apple cider sourdough is exactly that. It has a soft, slightly sweet crumb, a warm fall aroma, and a golden crust that just feels comforting.
What makes it different is simple: instead of water, the dough is made entirely with warm apple cider. That one swap transforms the flavor into something deeper and cozier, without being overly sweet. If you’re ready to try something new with your starter, this loaf is such a treat.
This post walks you step by step through my exact process, including the tools I use, the timeline I follow, and the little tricks that make sourdough simpler and more approachable.
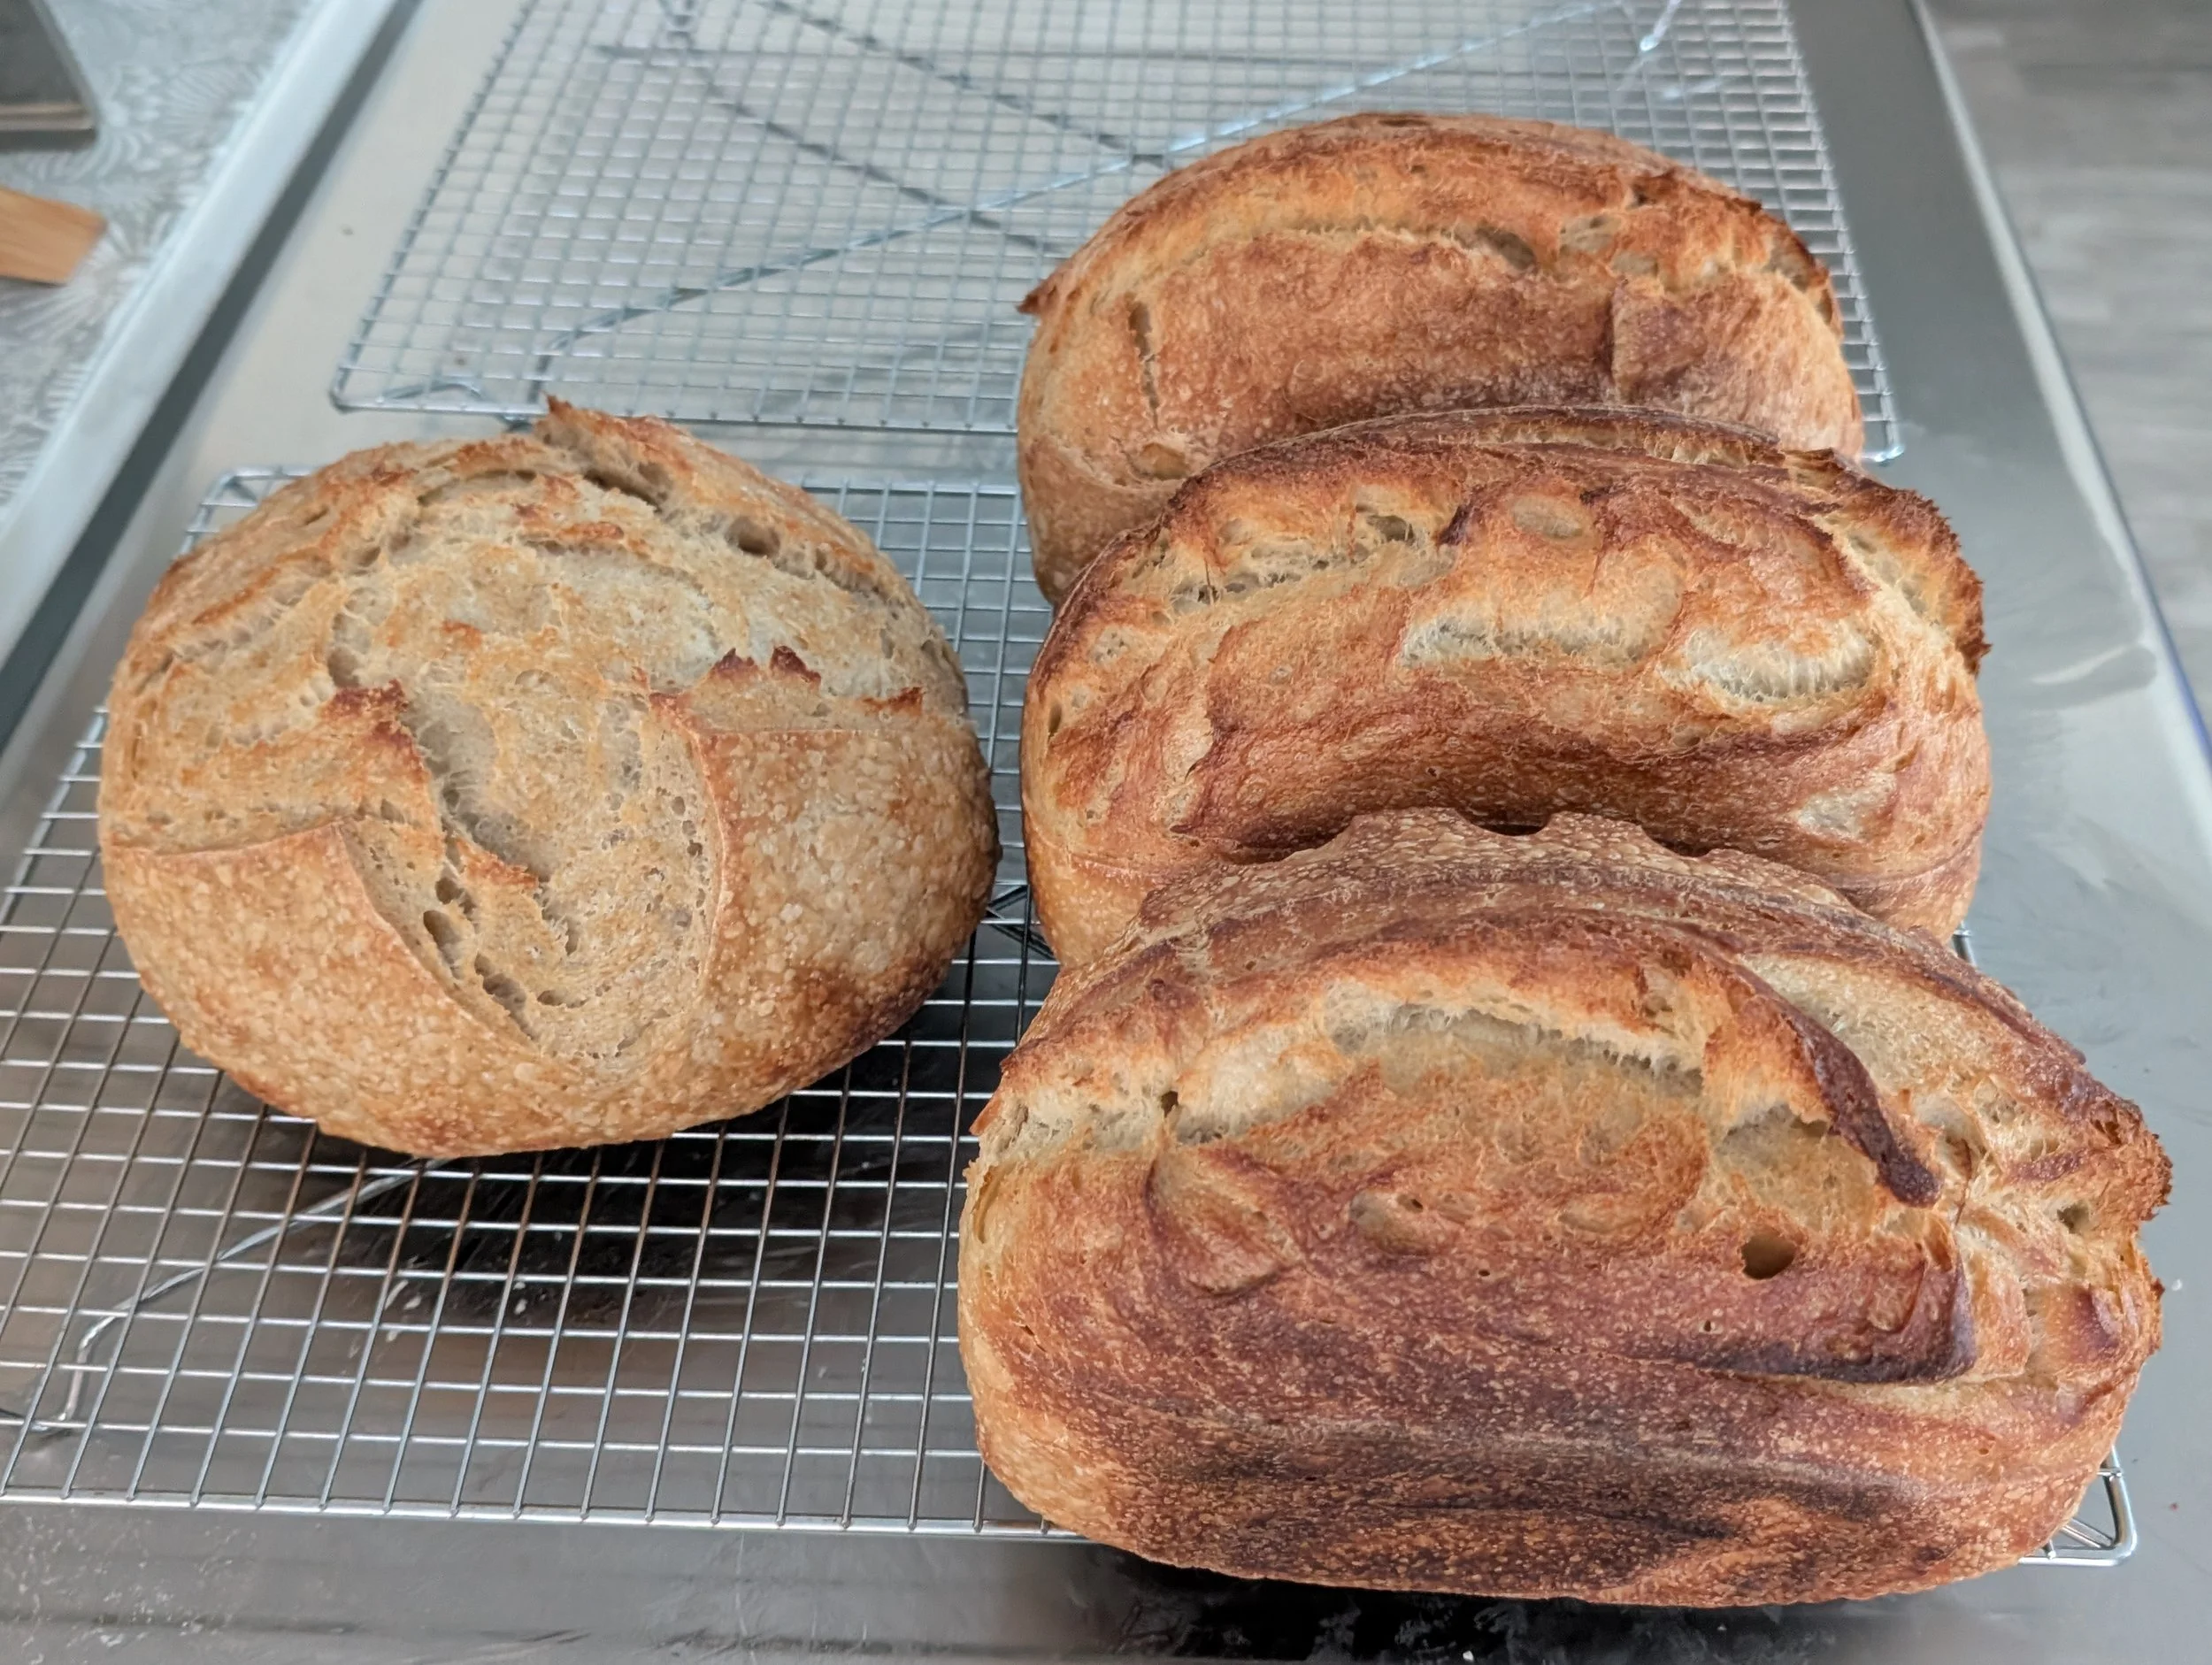
Baked sourdough loaves
Why Apple Cider Works So Beautifully in Sourdough
Using warm apple cider adds more than just flavor. It gently sweetens the dough, feeds the wild yeast, and creates a soft, tender crumb. Heating it to around 80°F helps it blend easily with the flour and starter and gives the dough a great head start during mixing.
The result is a loaf that smells like fall and tastes like comfort. Scroll to the bottom for quick steps and links to tools!
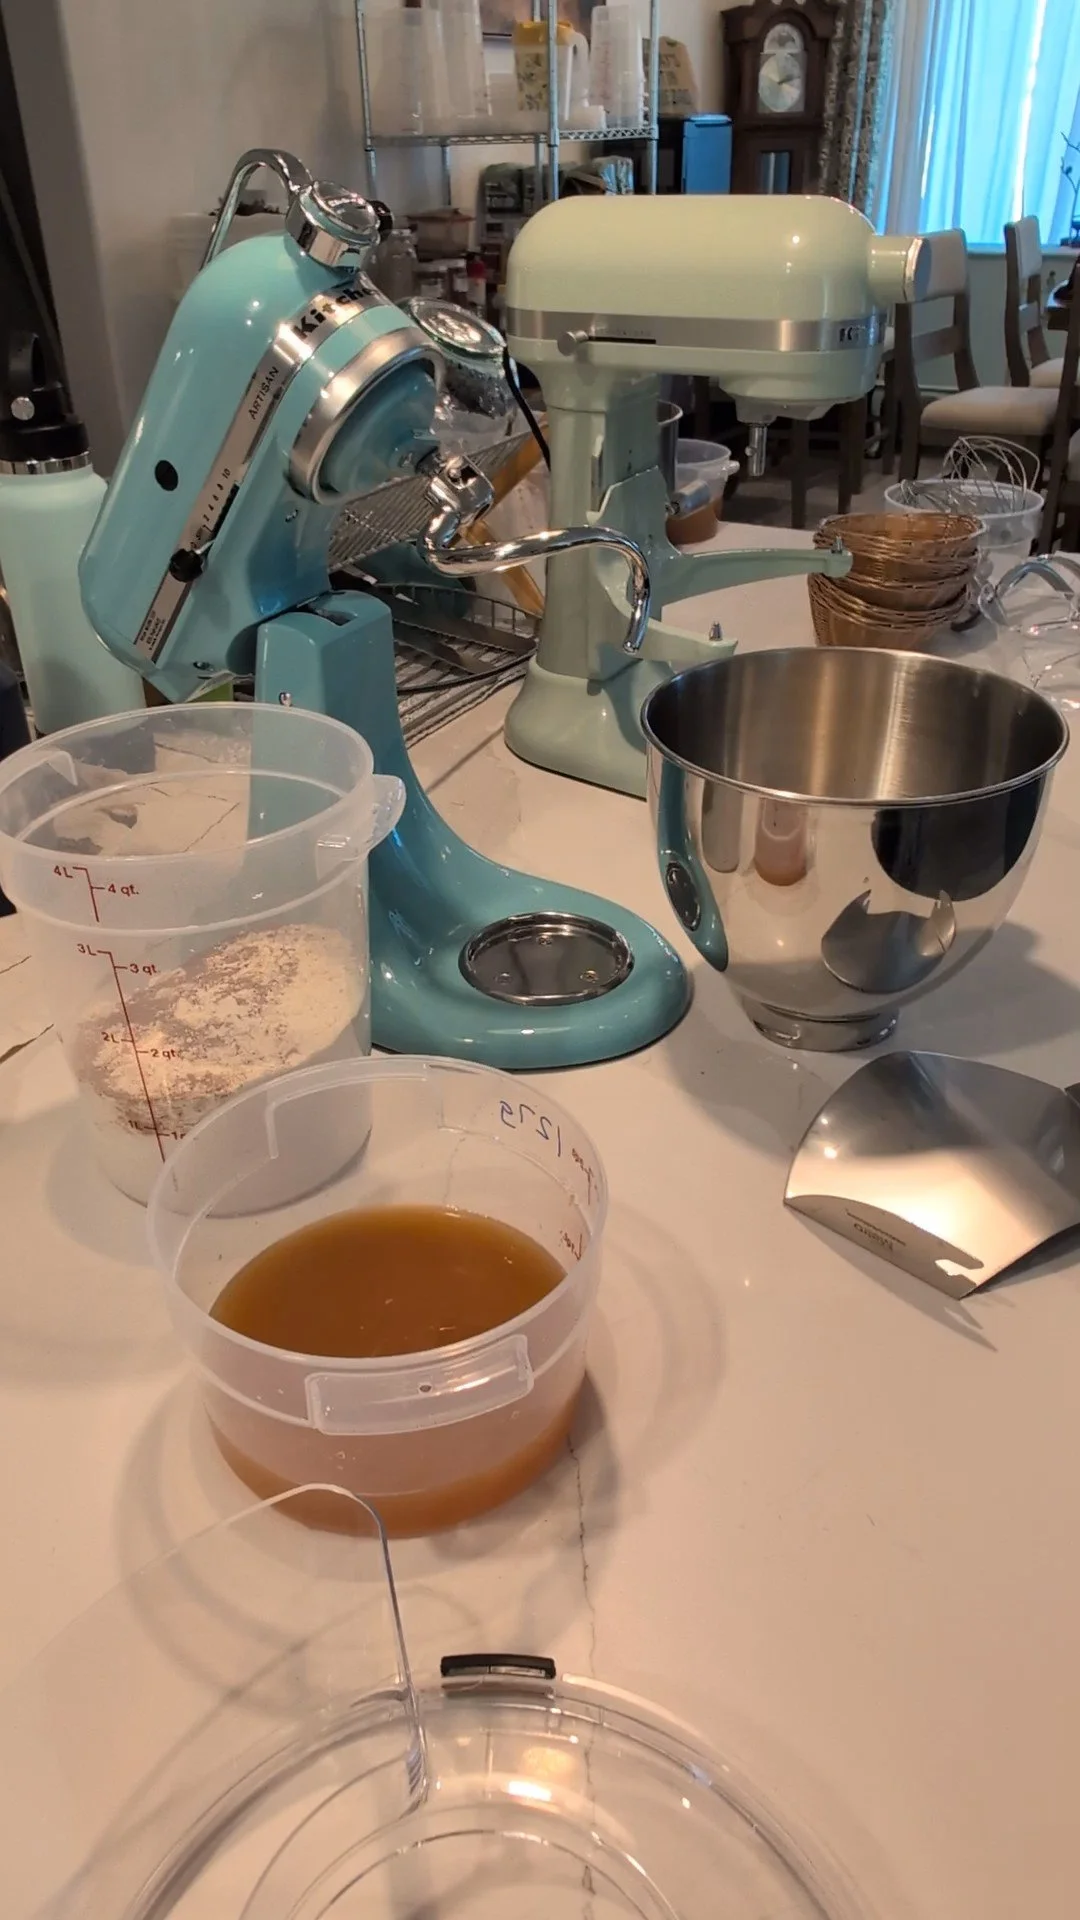
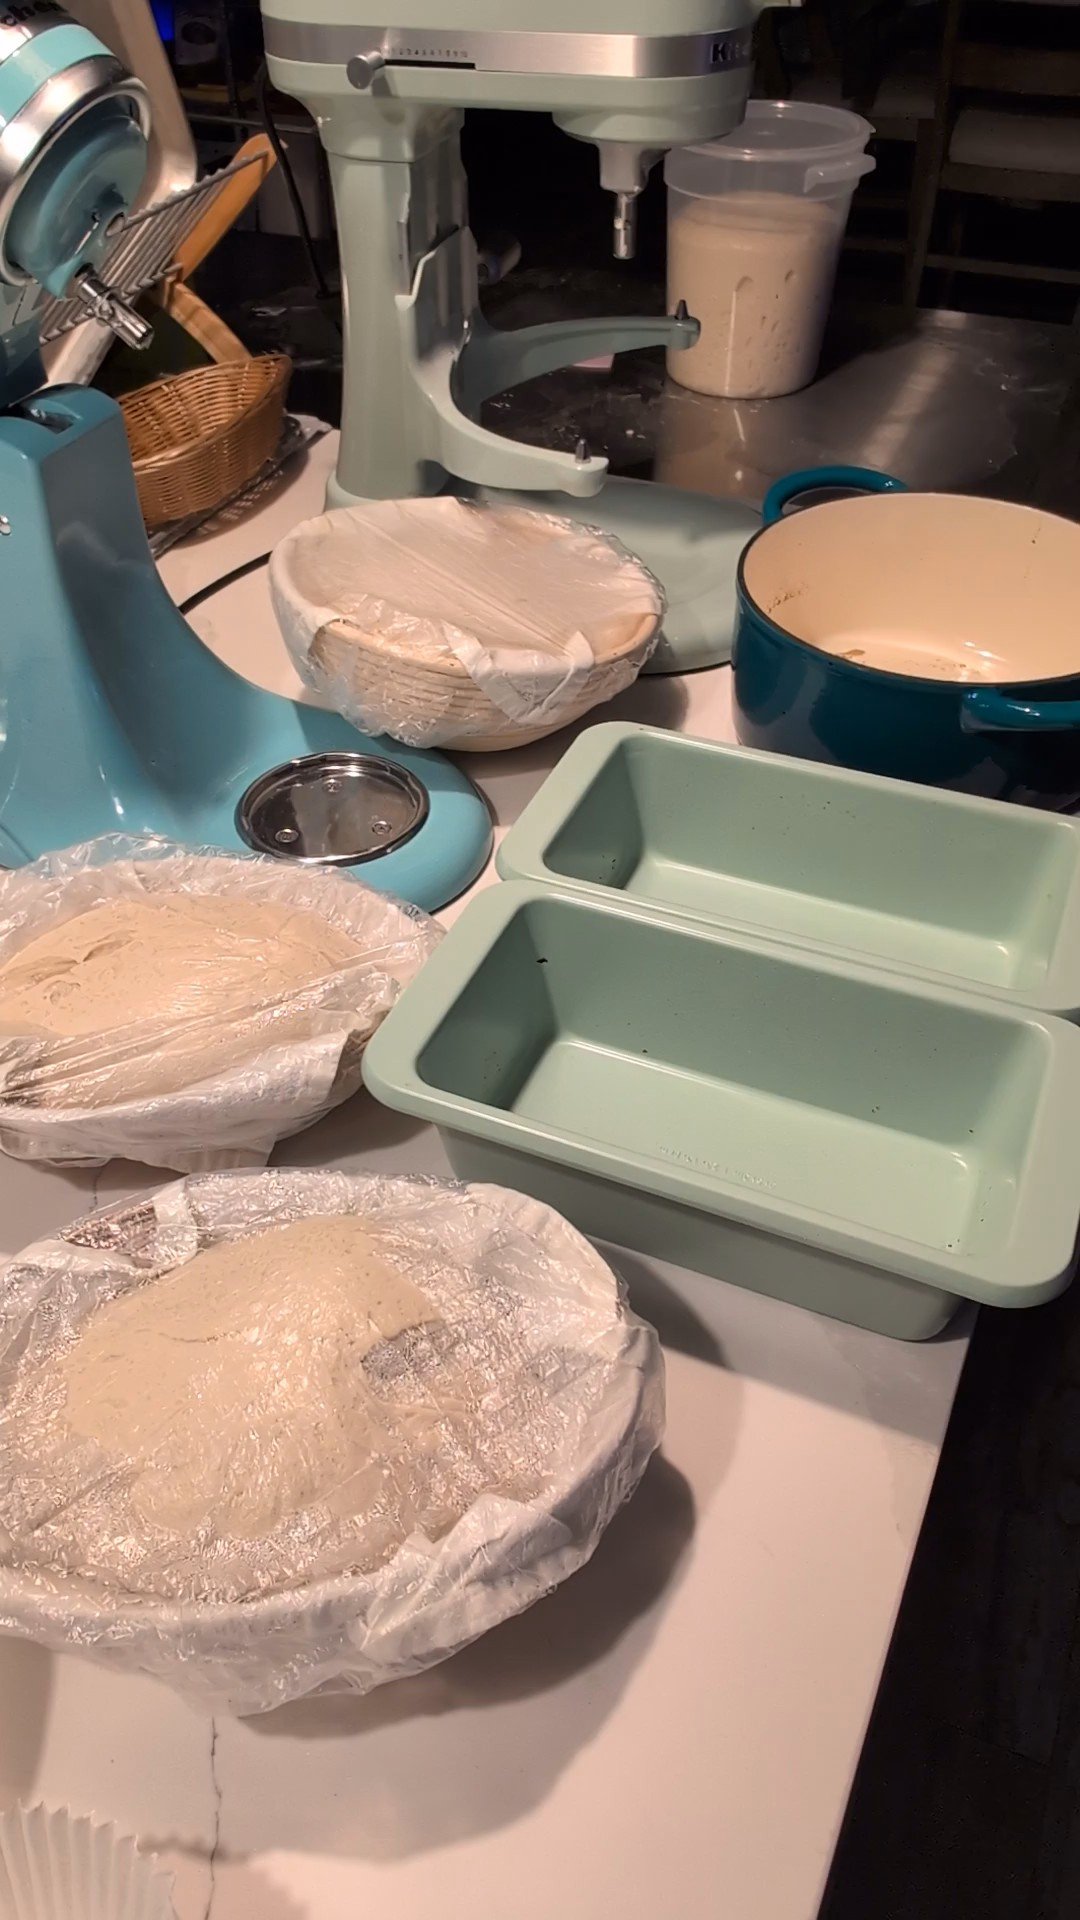
Tools I Love for This Recipe*
KitchenAid stand mixer
Dough container with lid
Bench scraper
Bowl scraper
Water mister or spray bottle
Kitchen scale
Organic cotton tea towels
Shaping baskets
Shower caps for covering
Cast iron Dutch oven or loaf pans
Instant-read thermometer
*find links at the bottom
Apple Cider Sourdough Recipe
Ingredients
500 g flour
320 g warm apple cider (heated to about 80°F)
100 g active sourdough starter
12 g salt
A drizzle of avocado oil (optional but helpful)
Step by Step Instructions
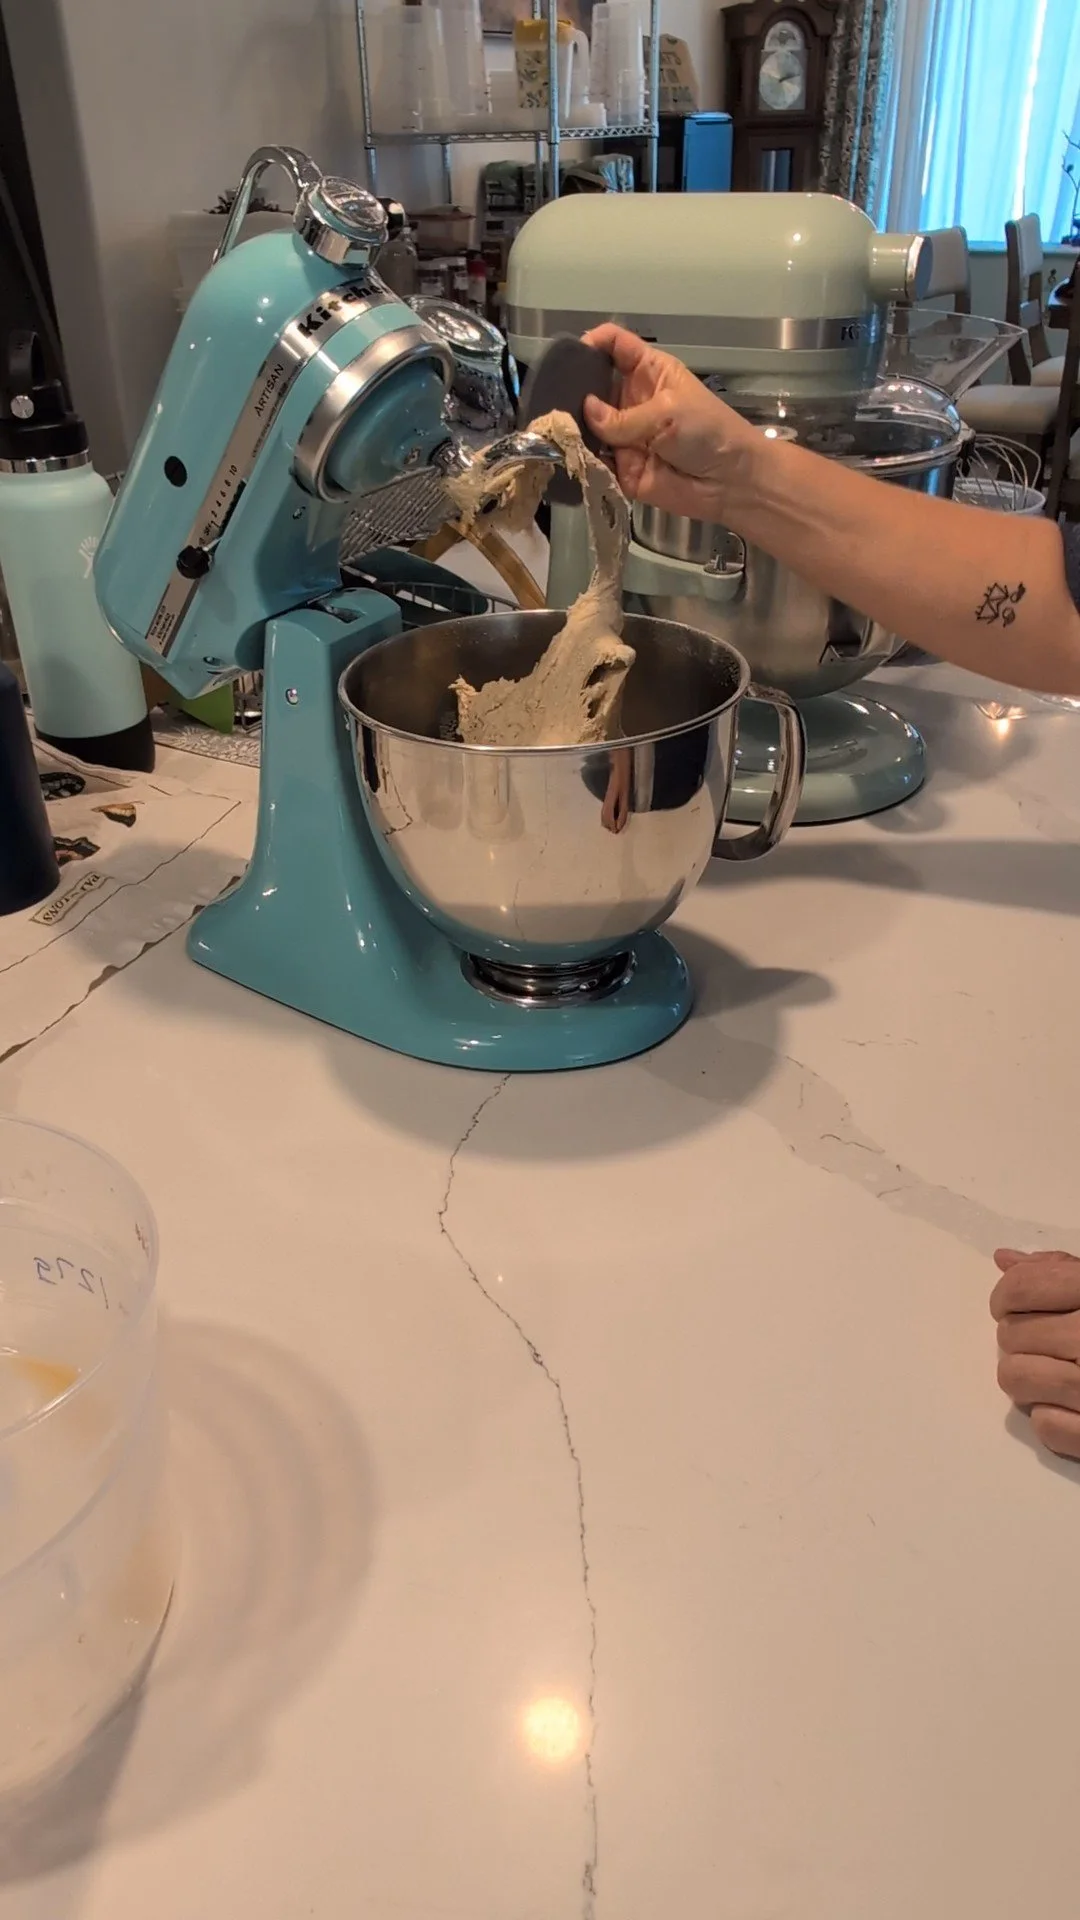
Mix the Dough
Add the starter, warm apple cider, to your mixer, then add the flour and salt.
While it mixes, drizzle in a little avocado oil. This softens the dough, improves the texture, and helps it pull away from the sides of the bowl.
Mix until the dough looks cohesive.
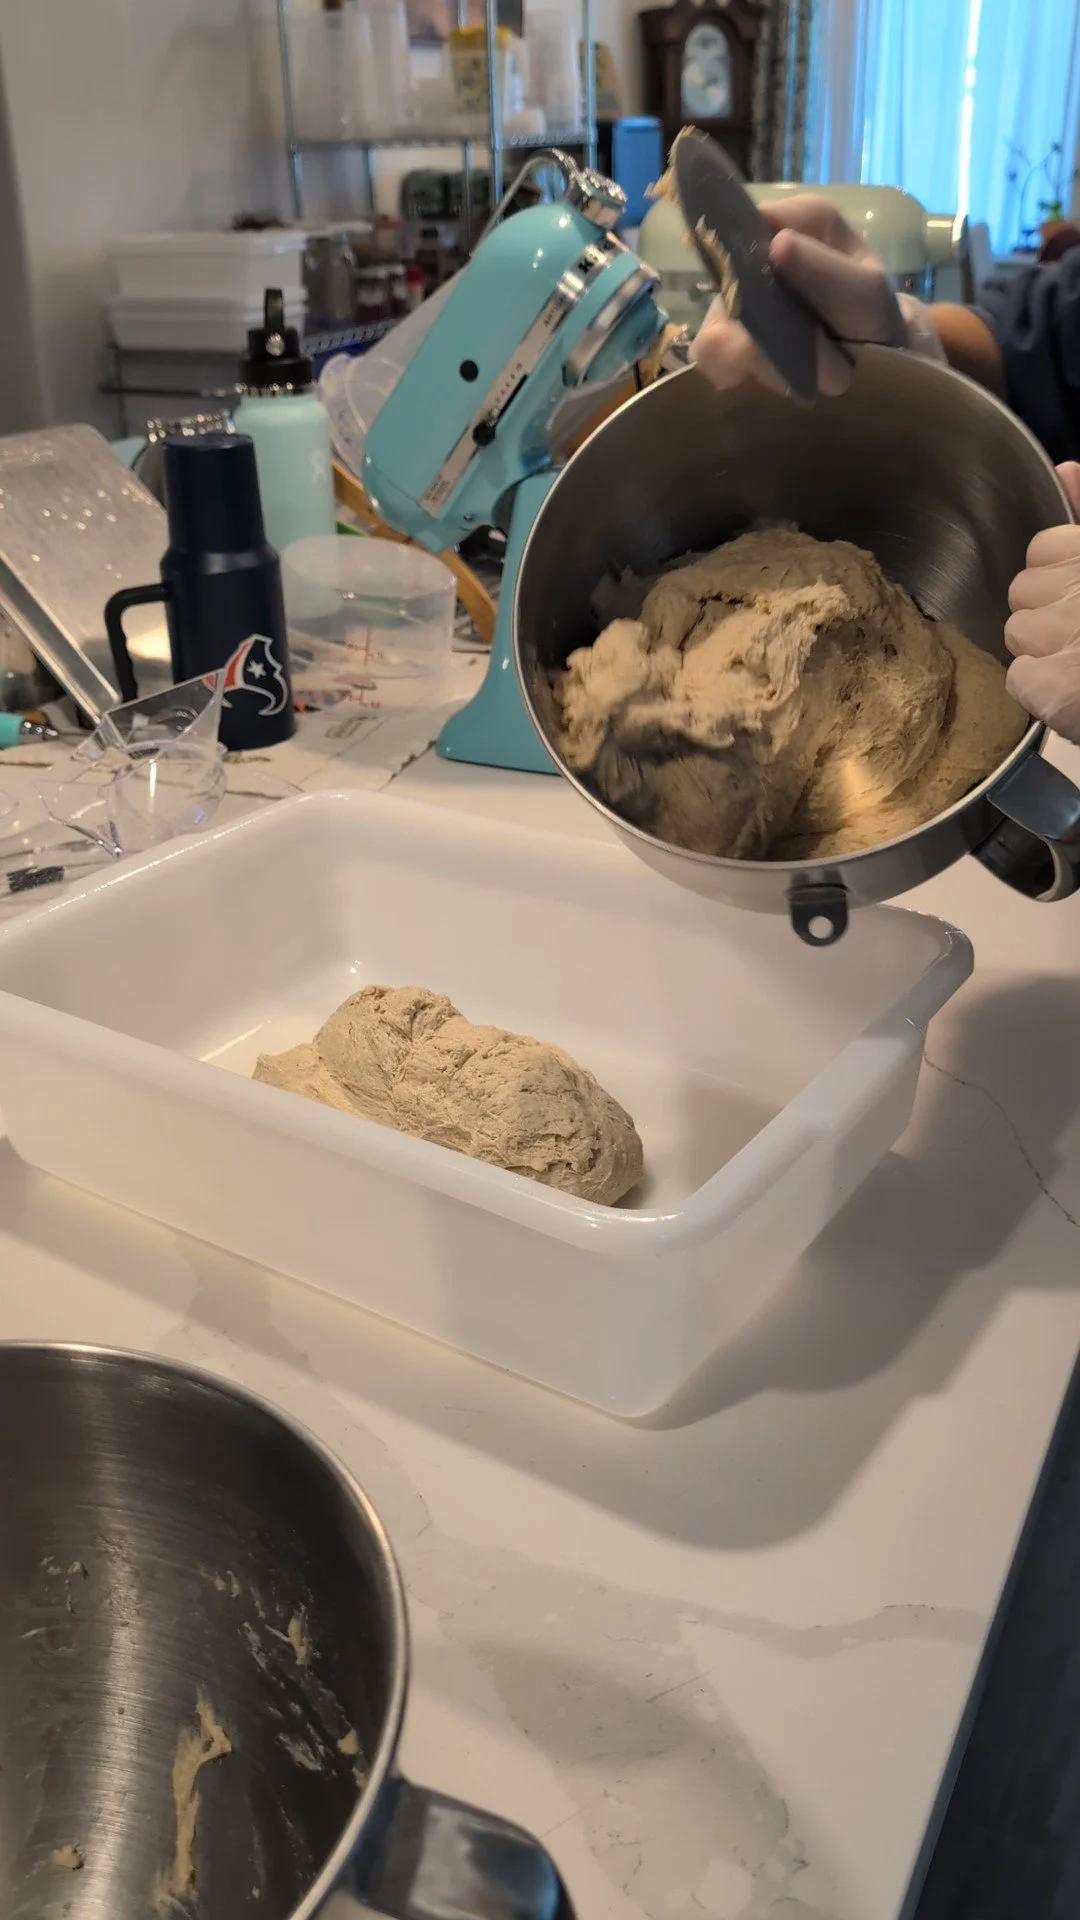
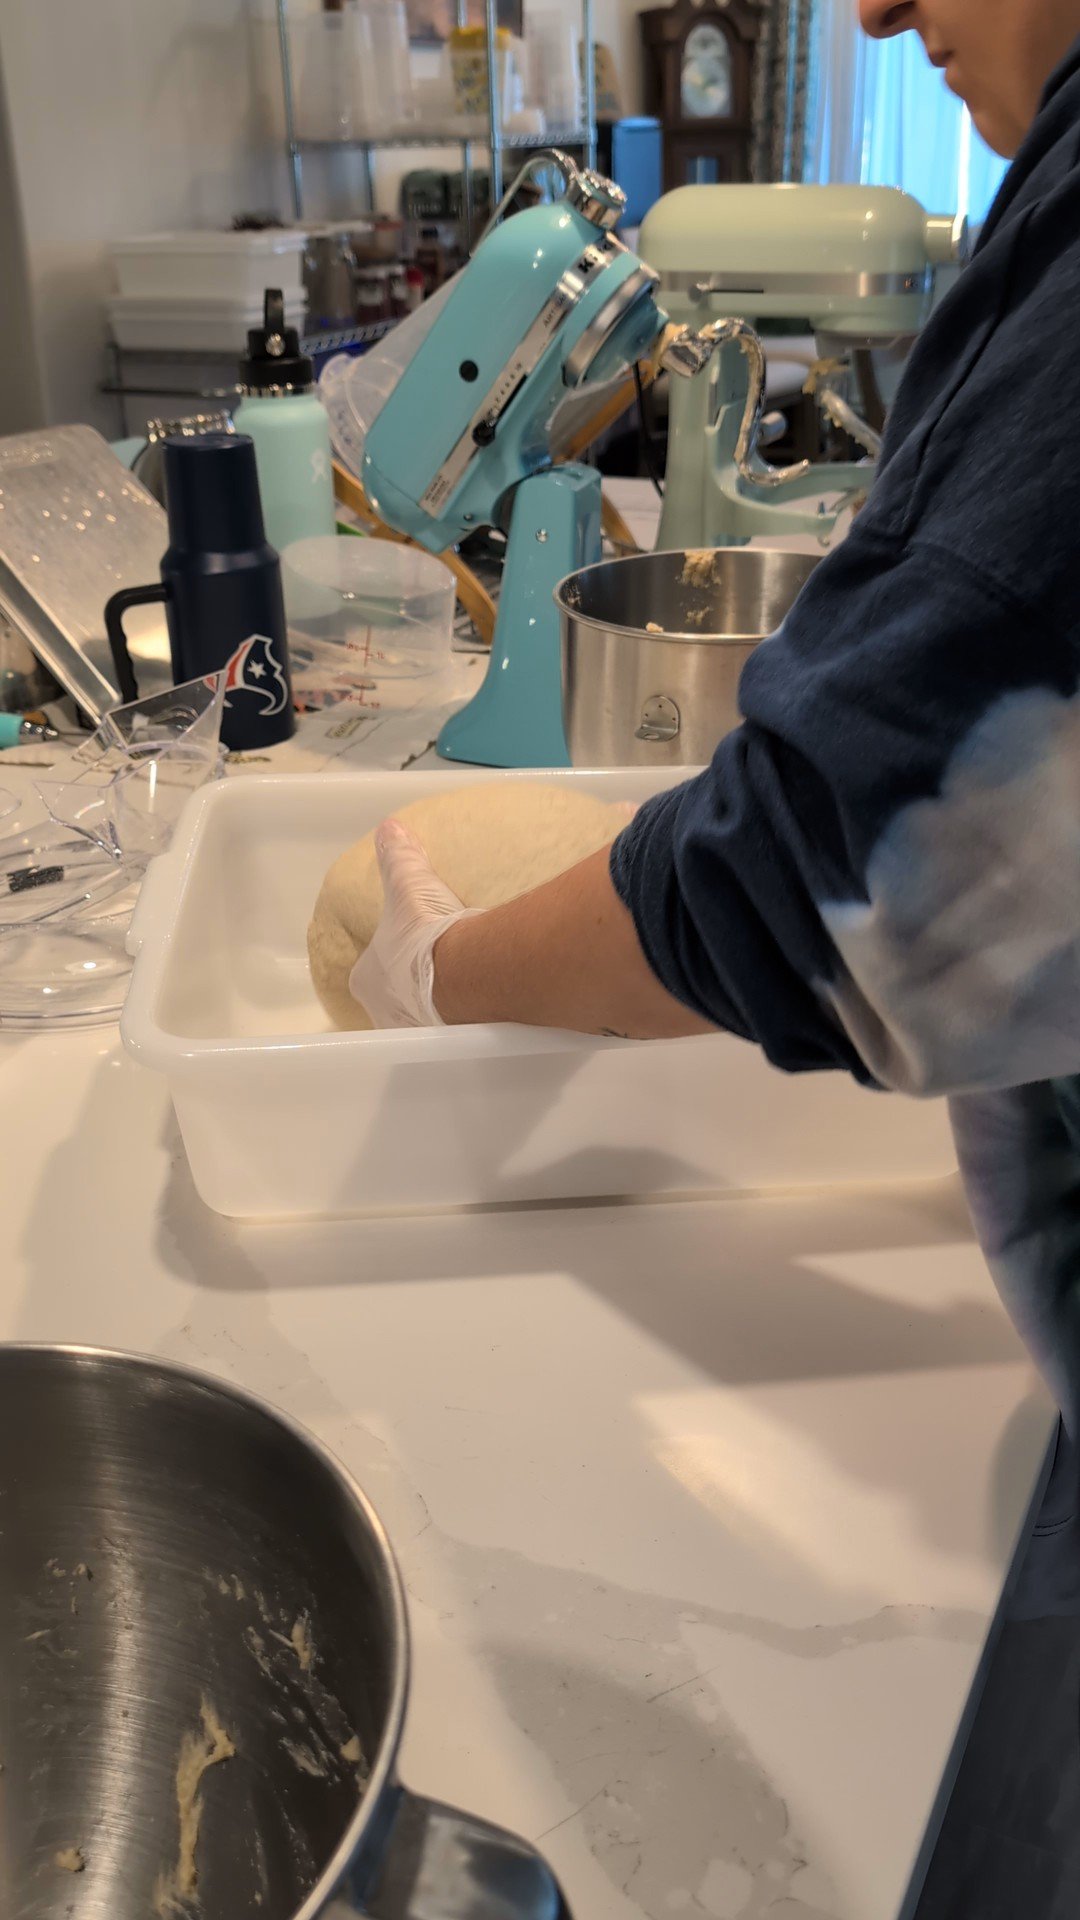
First coil fold
Transfer the dough to a container. Give it one gentle coil fold to build structure. Rest for 30 minutes.
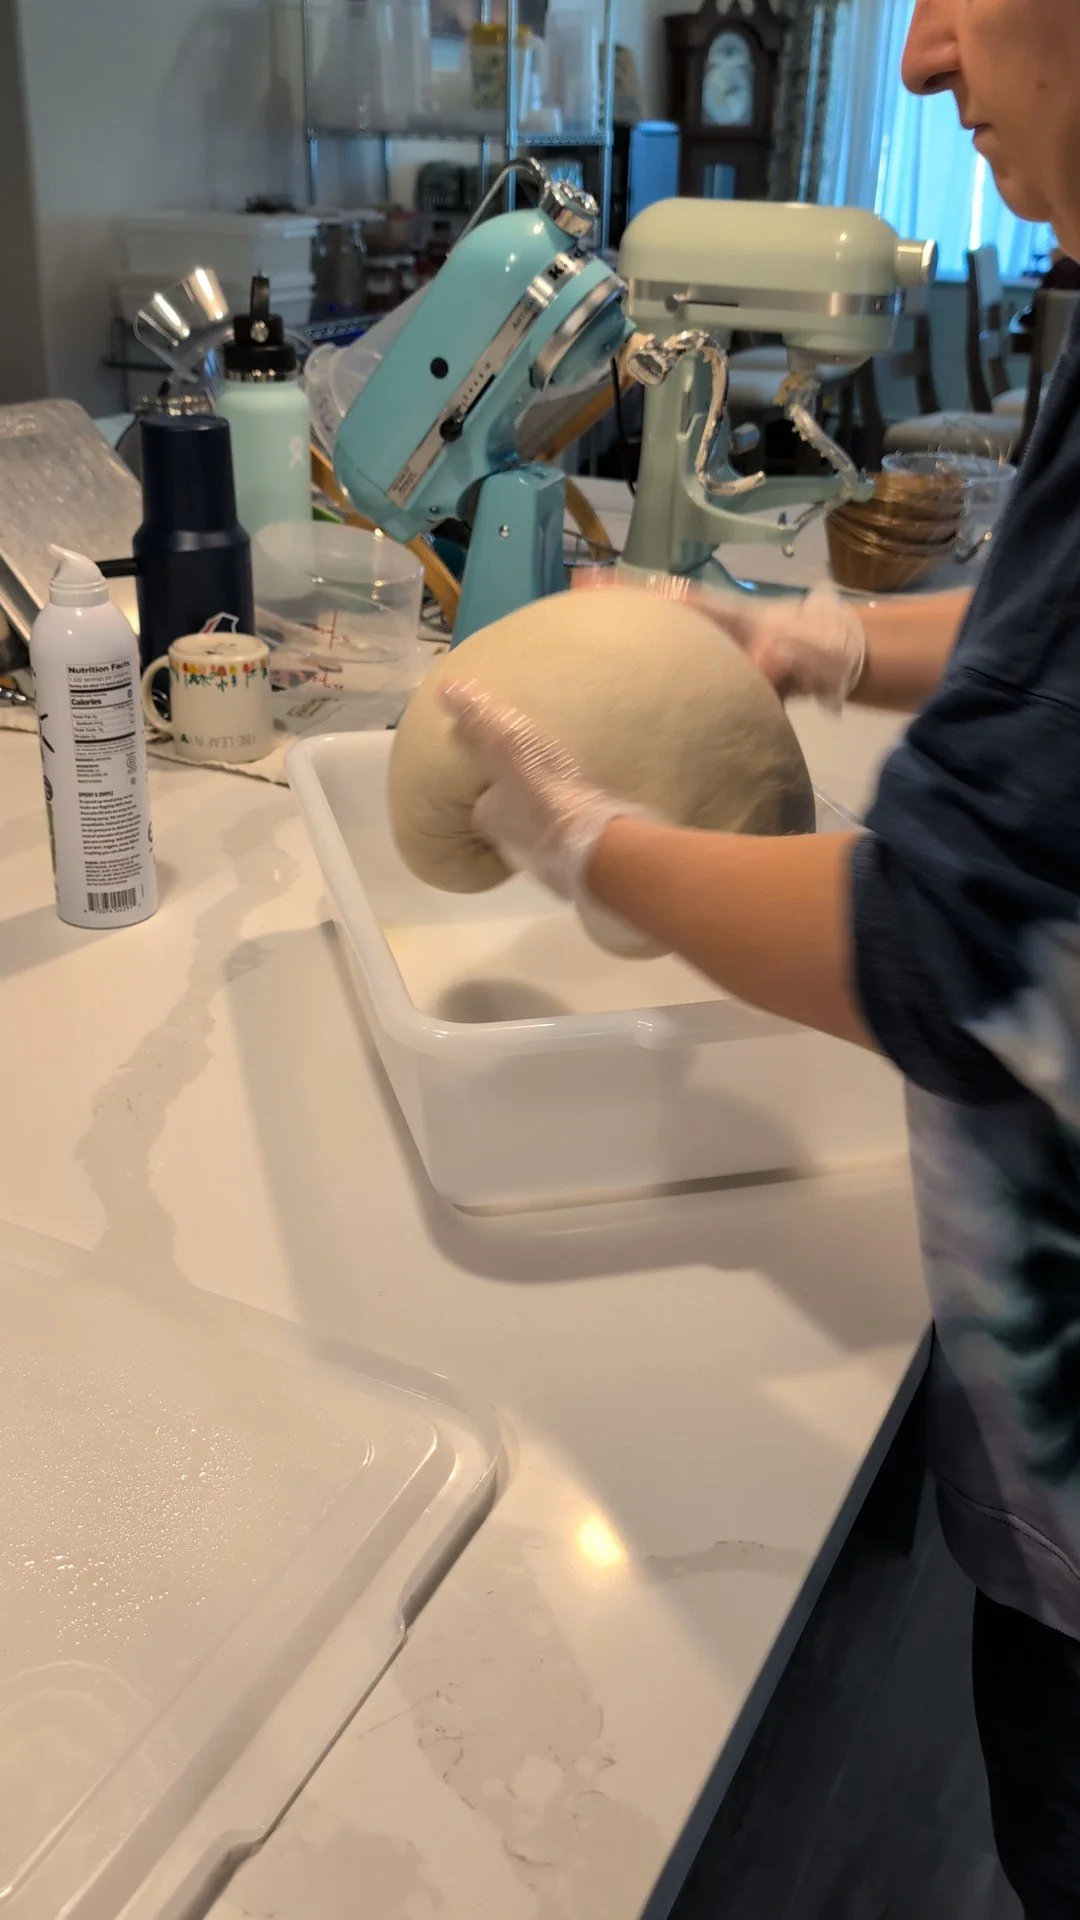
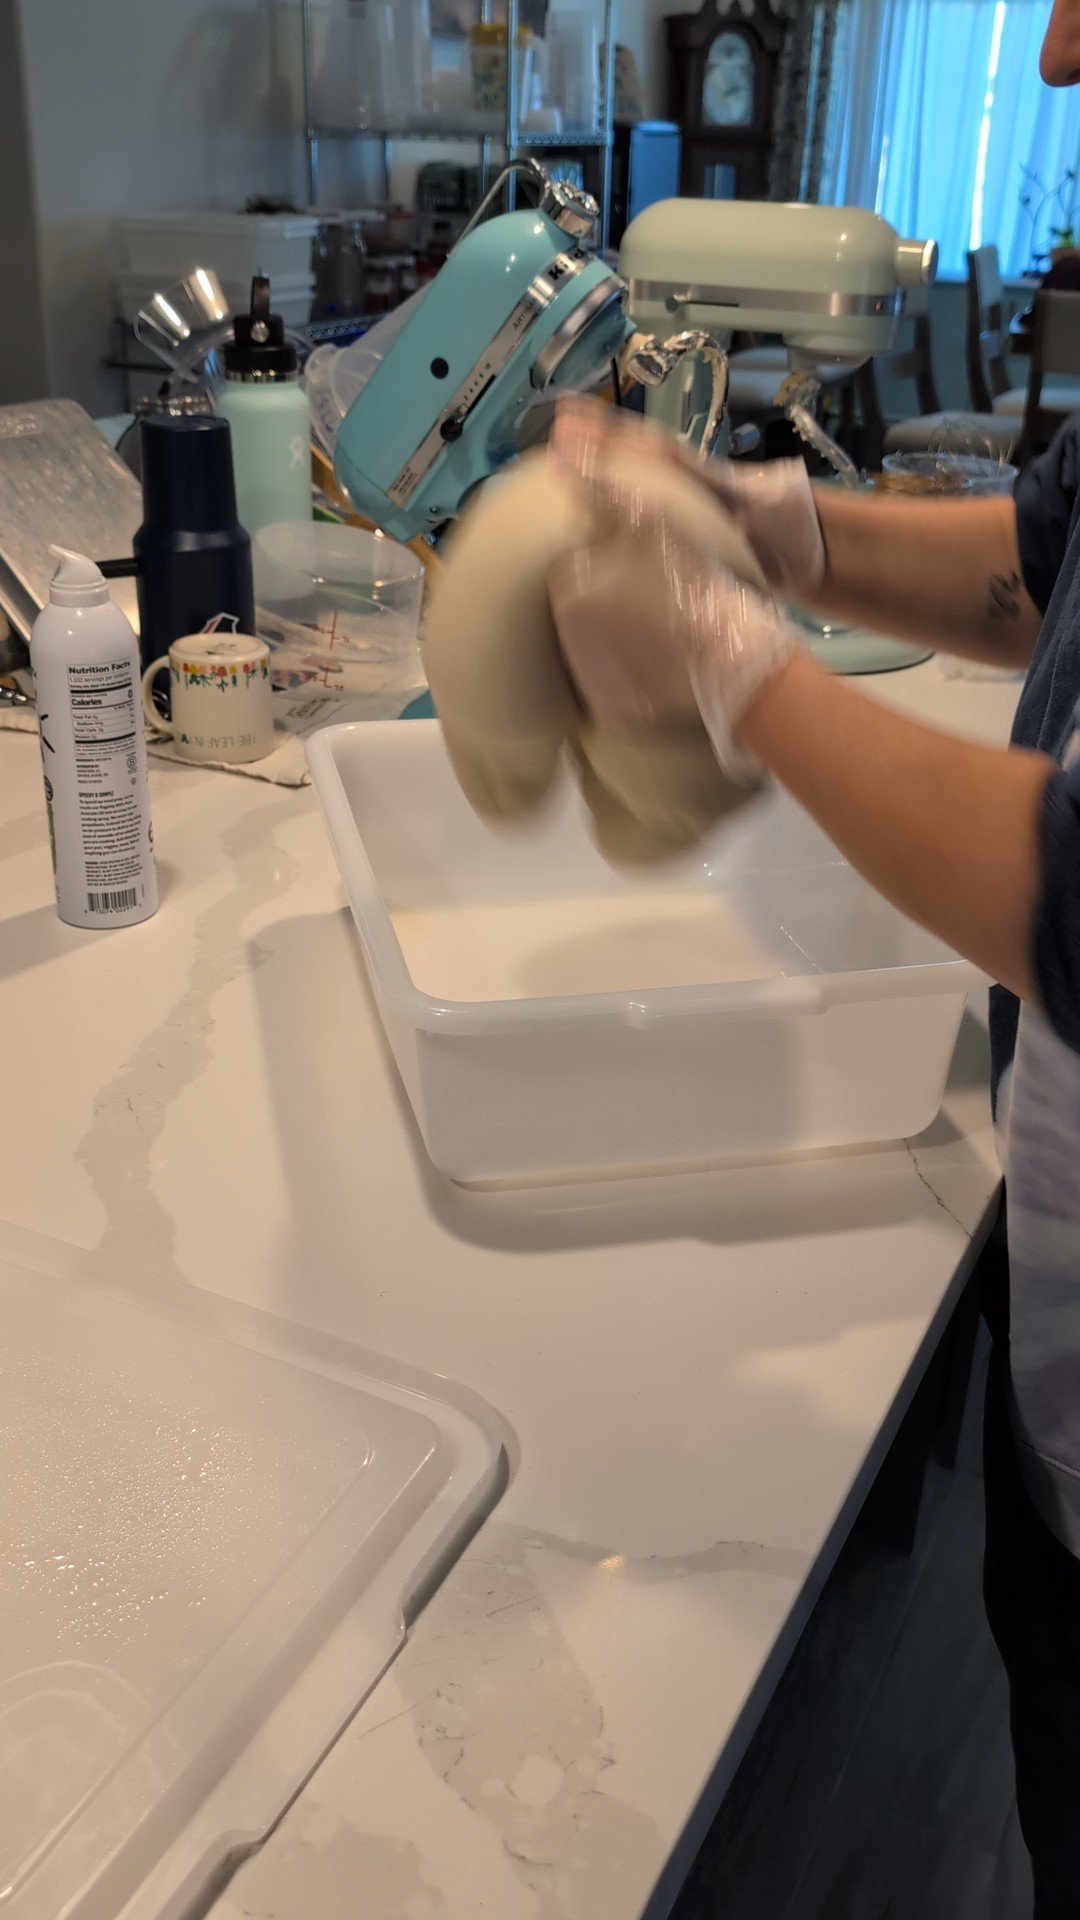
Additional Coil Folds
After 30 minutes, do more coil folds. Repeat this process 3 to 4 times, resting 30 minutes between rounds, until the dough is smooth and elastic.
You’ll feel the transformation as you go. The dough becomes silkier and stronger with each fold.
Bulk Fermentation
Let the dough rise for 8 to 12 hours depending on the warmth of your home. Cooler home means longer rise. Warmer home means shorter rise.
You’re looking for a dough that has puffed, relaxed slightly, and feels airy when you jiggle the container. It will roughly double in size.
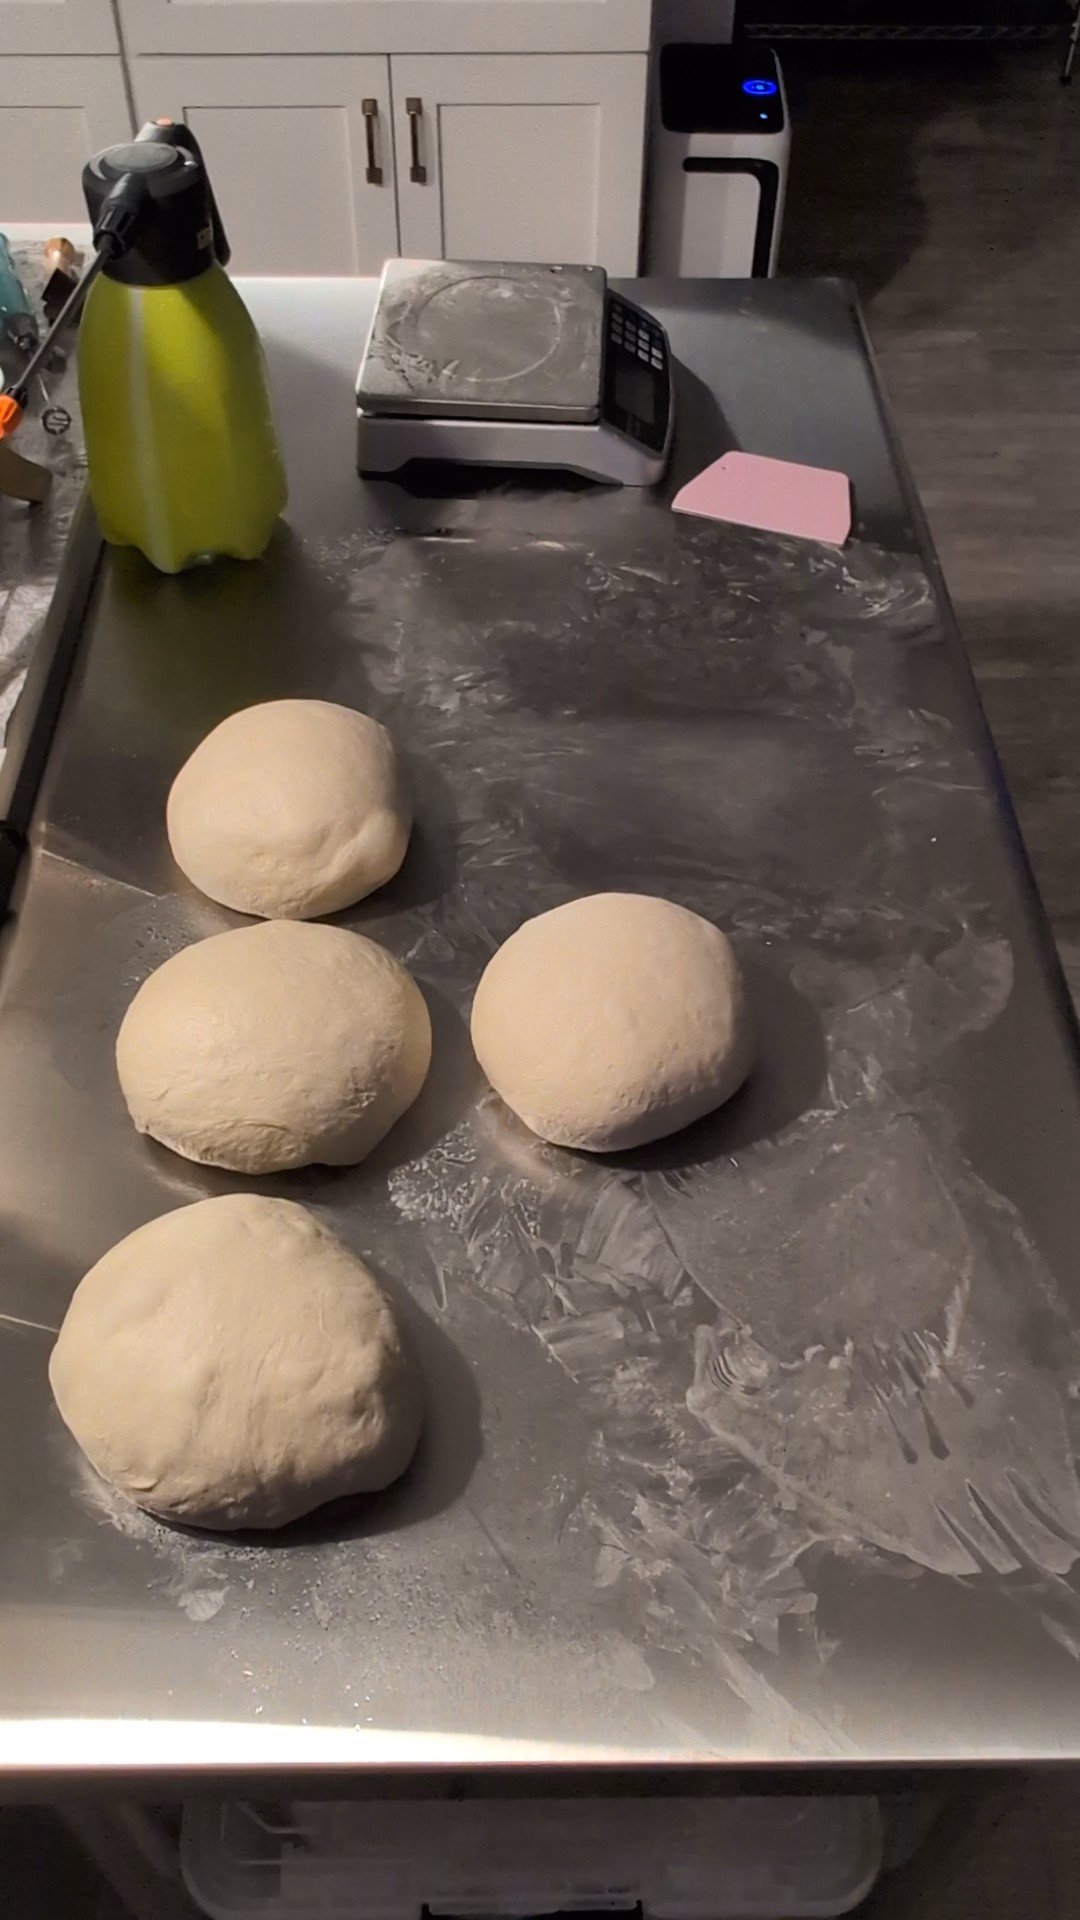
Divide and Shape
Spray your table with water to prevent sticking.
Weigh your full dough container, subtract the container weight
Divide the dough evenly depending on how many loaves you are making.
Shape each portion loosely and let it rest for about 20 minutes.
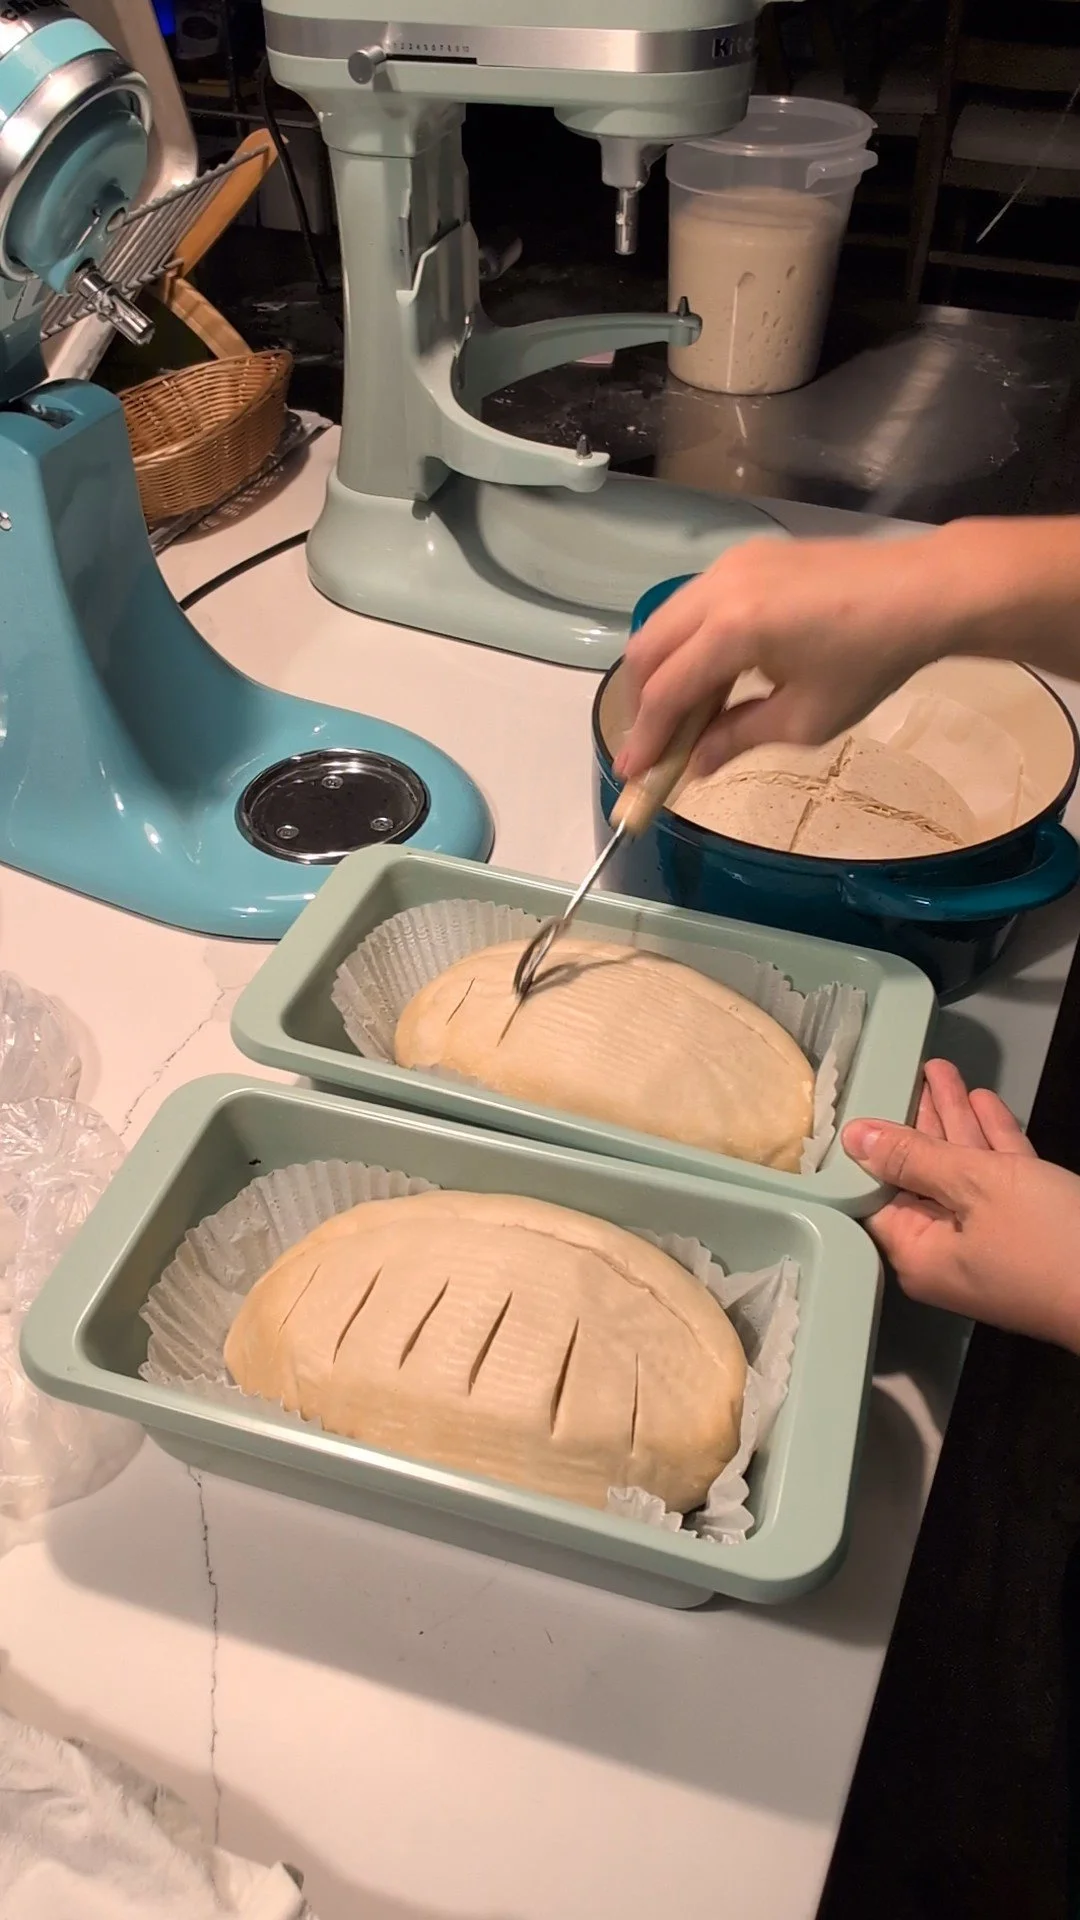
Final Shape
Flip each dough round over. Fold, pinch, and shape it into a tight loaf. Place each one into a banneton basket lined with an organic cotton tea towel.
Cover with a shower cap or reusable cover.
Cold Ferment Overnight
This step is optional. If you don’t want to do this step, or need to bake immediately, let sit in the baskets for about an hour, then proceed to next step.
Refrigerate the dough overnight. This long chill gives the loaf structure, improves the crust, and deepens the flavor.
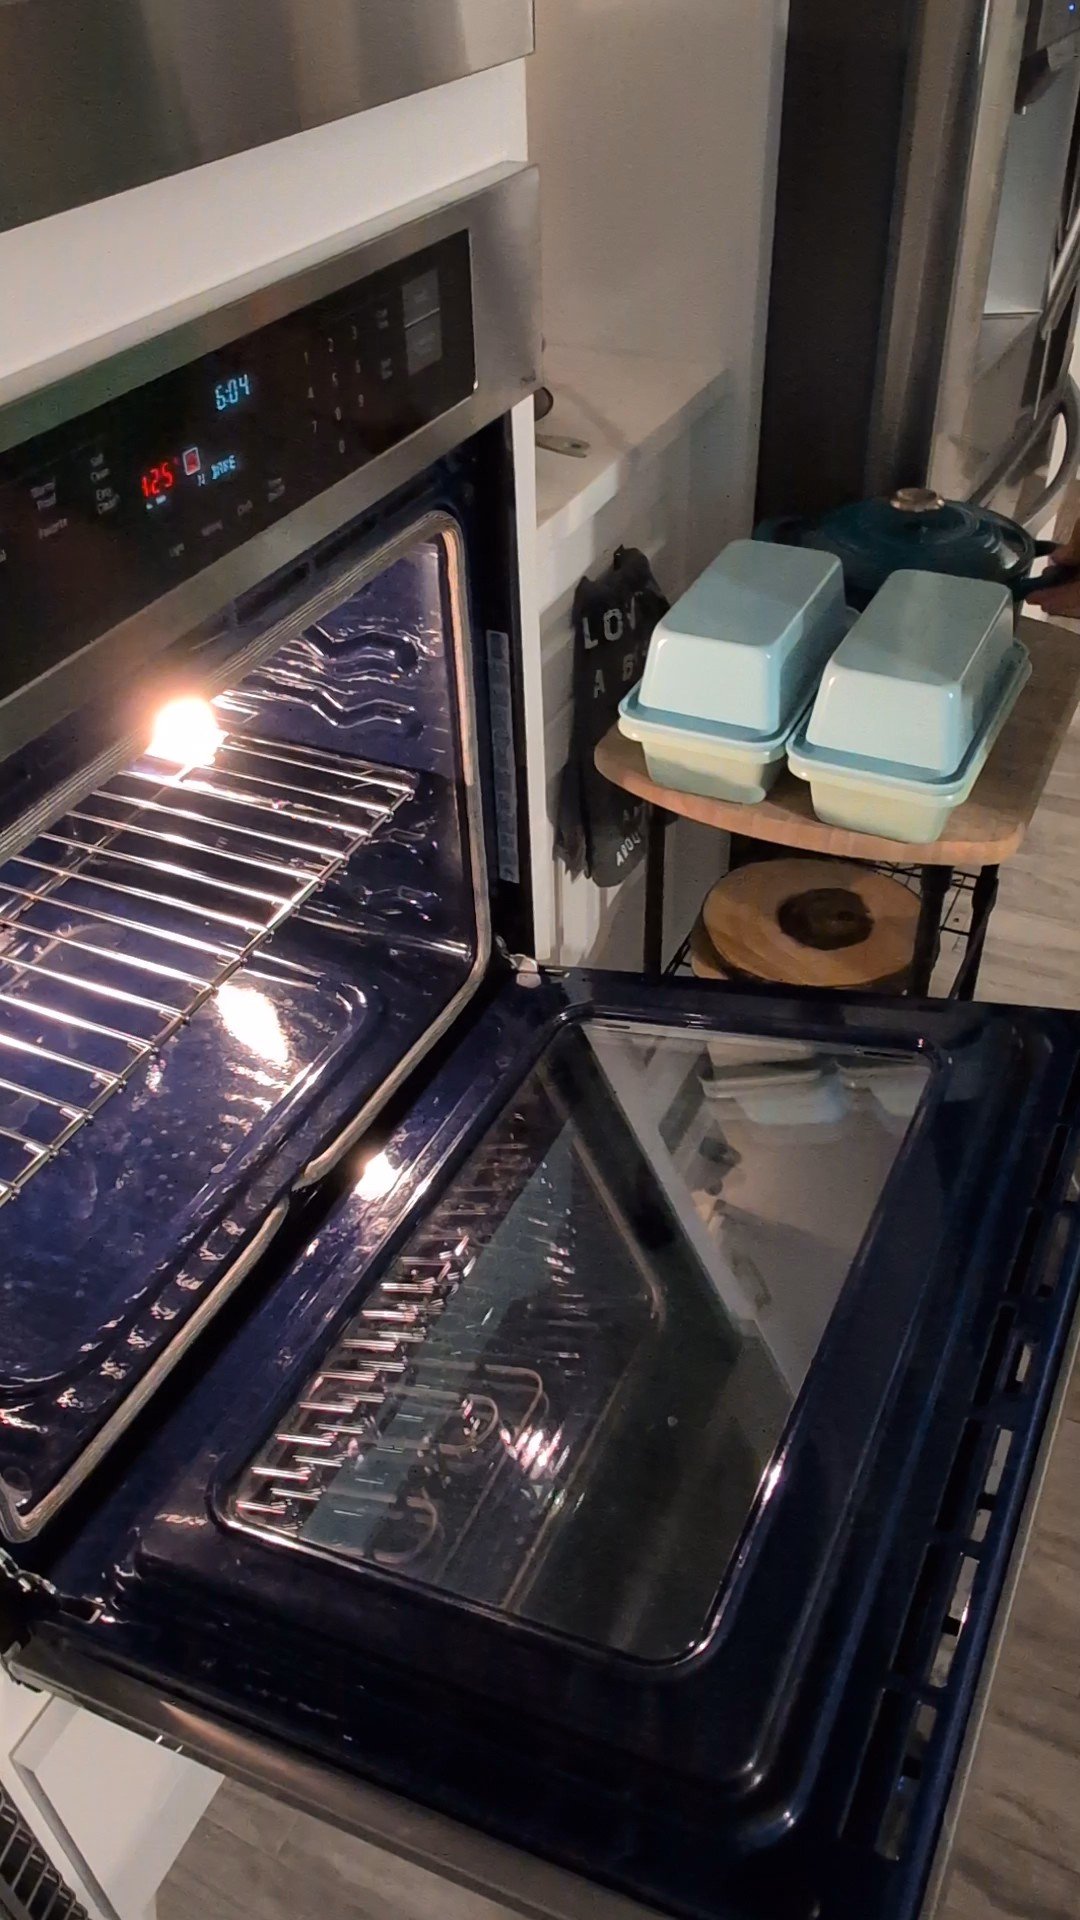
Bake Your Loaf
In the morning, flip each loaf onto parchment paper and place it into a Dutch oven or loaf pan.
Spray the top lightly with water.
Bake at 425°F convection for 25 to 35 minutes with the lid on. Remove the cover and bake 10 more minutes at 400°F to brown the crust.
The loaf is finished when the internal temperature reaches about 205°F. An instant-read thermometer is the easiest way to check.
Cool and Enjoy
Transfer the loaf to a cooling rack and let it cool for about 2 hours before slicing. The loaf needs to finish cooking.
If you cut it early, that’s ok! It might be a little gummy, but nothing a toaster can’t fix.


Apple Cider Sourdough: Quick Steps
Mix
Starter + warm apple cider in mixer.
Add flour + salt. Mix with a drizzle of avocado oil.Fold
Coil folds every 30 minutes, 3–4 times.Bulk Ferment
Let rise 8–12 hours.Divide & Rest
Divide dough, pre-shape, rest 20 minutes.Shape & Chill
Final shape into bannetons.
Refrigerate overnight.Bake
Bake 425°F convection 25–35 minutes covered.
Then 400°F for 10 minutes uncovered.
Finish at 205°F internal temp.Cool
Cool 2 hours, slice, enjoy.
Tips for Success
If your home is cold, place the dough somewhere warmer such as near the stove or inside the oven with the light on.
The overnight cold ferment is important for texture and flavor, but not required.
Don’t stress! Everyone finds their own process and vibe over time.
Sourdough Tool Links*
Water mister or spray bottle
Affiliate Note*
Some links on this page may be Amazon affiliate links. This means I may earn a small commission at no extra cost to you if you make a purchase through them. I only share products I personally use and love.